
A roofing installation protects your home from rain, wind, heat, snow, and damaging moisture. The work involves much more than attaching shingles to wood decking. A dependable project requires proper preparation, ventilation, flashing, waterproofing, fastening, and final inspection.
For many U.S. homeowners, replacing a roof is one of the largest exterior home projects they will finance. Costs vary widely because roof size, material, pitch, location, and needed structural repairs affect the price. Understanding the process helps you compare bids and spot missing work before signing a contract.
Roofing Installation at a Glance
| Project detail | What homeowners should expect |
|---|---|
| Typical materials | Asphalt shingles, metal, tile, wood, or synthetic products |
| Common project length | Several days for many standard homes |
| Major cost factors | Size, material, pitch, labor, tear-off, decking, and location |
| Key preparation | Inspection, permits, material delivery, and property protection |
| Main work stages | Tear-off, deck inspection, waterproofing, flashing, surface installation, ventilation, cleanup |
| Best starting point | Compare detailed written estimates from qualified local contractors |
Direct answer: A typical new roof project starts with removing old materials and inspecting the deck. Installers then add water protection, flashing, ventilation components, and the selected surface material. The project ends with ridge finishing, cleanup, and inspection. Costs depend heavily on roof size, material, design, and local labor rates.
What Does Roofing Installation Cost in the U.S.?
National price estimates vary because no two houses have identical roof dimensions and conditions. Recent estimates place many asphalt replacement projects within roughly $8,000 to $22,000 for a 2,000-square-foot roof. Premium metal, tile, or slate can substantially increase the total.
Your living area square footage does not equal the surface area above it. Pitch, overhangs, dormers, valleys, and attached structures can increase the measured area. Contractors commonly calculate materials in “squares,” which cover 100 square feet.
Several additional items can change an estimate after inspection. Damaged decking, multiple old layers, steep slopes, disposal fees, and difficult access can increase labor or material costs. Permits and local code requirements can also affect the final contract price.
Common Material Cost Differences
| Material | Relative cost | Main consideration |
|---|---|---|
| Asphalt shingles | Lower | Affordable and widely available |
| Architectural shingles | Low to moderate | Thicker appearance and longer expected service |
| Metal | Moderate to high | Higher upfront cost with long service potential |
| Clay or concrete tile | High | Heavy material may require structural review |
| Slate | High | Long-lived but expensive and heavy |
| Wood shakes | Moderate to high | Appearance and maintenance vary by climate |
Asphalt remains a common residential choice because it combines availability with a lower initial price. Metal usually costs more, but many systems offer longer expected service. Tile and slate can require additional structural consideration because of their weight.
Roofing Installation Steps From Start to Finish
Homeowners don’t need to do the work themselves to understand a professional roofing project. Knowing each stage helps you compare contractor proposals more accurately. It also makes progress easier to follow once crews arrive.
- Inspect and measure the existing roof. The contractor evaluates surfaces, flashing, penetrations, ventilation, and visible structural problems.
- Confirm permits and materials. Local requirements are checked before materials and equipment arrive.
- Protect the property. Crews cover landscaping and position containers for removed debris.
- Remove old materials. Existing shingles or other coverings are stripped when the project requires a full tear-off.
- Inspect the roof deck. Damaged, soft, or deteriorated sections are identified and repaired before new materials cover them.
- Install water-shedding layers. Drip edge, underlayment, and required water barriers help protect vulnerable areas.
- Install flashing and ventilation components. Detail valleys, chimneys, walls, vents, and other penetrations appropriately.
- Install the finished roof covering. Crews follow the product’s fastening pattern, layout, and manufacturer requirements.
- Complete ridges and edges. Ridge caps and remaining trim create finished transitions and weather protection.
- Clean and inspect the site. Crews remove debris, collect loose fasteners, and review the completed work.
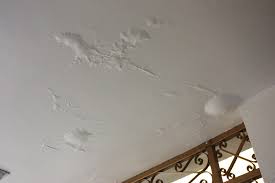
The deck inspection is especially important because finished materials can hide underlying damage. Water intrusion may weaken sheathing before leaks become obvious inside your house. A HomeGuru guide to preventing damage from water leaks explains why early moisture control matters.
What Should Be Under a New Roof?
The visible surface is only one part of the protective assembly. Most systems also use a deck, underlayment, edge components, flashing, fasteners, and ventilation. Specific requirements depend on the product, climate, local codes, and manufacturer instructions.
Underlayment creates another water-shedding layer beneath the finished covering. Flashing directs water away from valleys, walls, chimneys, and penetrations. Proper ventilation also helps manage heat and moisture in attic spaces.
These hidden details matter because small installation errors can cause expensive damage later. Problems often appear around penetrations, transitions, and roof edges before they show up on broad, open surfaces. Homeowners should make sure each contractor describes these components in writing.
Should You Remove Old Shingles First?
A complete tear-off gives contractors access to the underlying deck. That access makes hidden deterioration, water damage, and damaged sheathing easier to identify. Removal also prevents adding another heavy layer to the structure.
An overlay may be permitted in limited situations, depending on local rules and existing conditions. It can reduce initial labor because the old layer remains in place. Still, it may hide problems that would otherwise become visible during removal.
Ask your contractor which method the estimate assumes before comparing prices. A cheaper proposal may simply exclude tear-off, disposal, or deck repairs. Written scope details make it easier to compare competing estimates fairly.
How Long Does a New Roof Take?
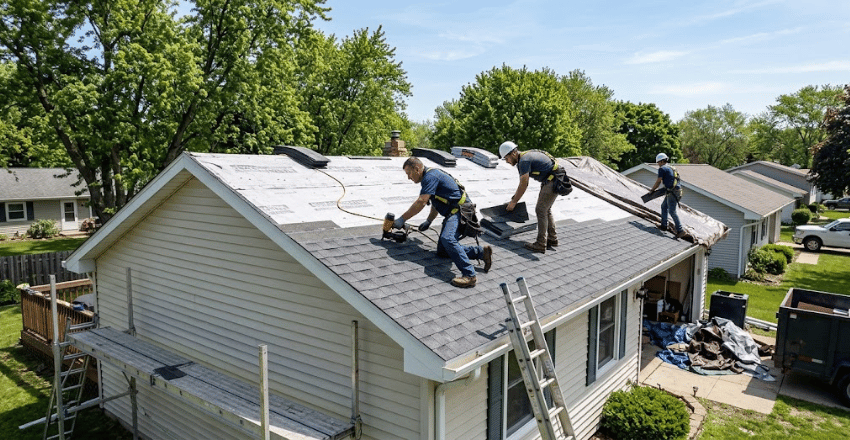
Many straightforward residential projects can be completed within several working days. Larger houses, complex designs, premium materials, and structural repairs may take longer. Weather can also pause work when conditions become unsafe.
Scheduling should include more than the days installers spend on the house. Material ordering, permit approval, inspections, and specialized components can extend the complete project timeline. Ask for both an expected start date and a realistic completion window.
Property conditions also affect crew efficiency. Trees hanging over the structure can limit access or create later maintenance problems. A HomeGuru guide to planting trees a safe distance from your house explains how branches can affect roofs and gutters.
Why Professional Safety Procedures Matter
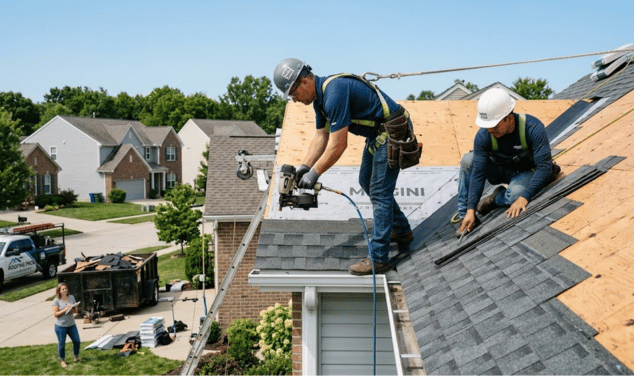
Working at roof height creates serious fall hazards. OSHA states that workers in residential construction generally need fall protection at heights of six feet or more. Acceptable systems can include guardrails, safety nets, or personal fall-arrest equipment.
That risk makes full replacement a poor beginner project for most homeowners. Nail guns, ladders, steep surfaces, changing weather, and heavy materials add hazards. Professional crews should also receive appropriate training for their fall-protection systems.
You can evaluate safety practices before work begins without climbing onto the structure yourself. Ask how the company protects workers, landscaping, windows, vehicles, and people below. A contractor should be able to explain its process without avoiding basic safety questions.
How to Compare Roofing Contractor Estimates
Three estimates with similar totals may include different amounts of work. Request itemized proposals to spot differences before choosing a contractor. The lowest number offers little value when essential work later appears as an extra charge.
Look for clear information on each of the following items.
- Removal and disposal of existing materials
- Deck repairs and their pricing method
- Underlayment and water barriers
- Flashing replacement
- Ventilation components
- Material brand and product line
- Permit responsibility
- Cleanup and debris removal
- Manufacturer warranty information
- Contractor workmanship warranty
- Payment schedule and change-order rules
Insurance and licensing requirements vary by state and municipality. Verify the required credentials for the property’s location. Also confirm which party obtains permits and schedules required inspections.
Storm-prone homeowners should ask how the proposed system addresses local wind and weather requirements. Existing damage should be repaired before new materials hide it. A HomeGuru article about hurricane roof damage and professional repair shows several warning signs worth checking after major storms.
What Can Increase the Final Price?
Deck deterioration is one of the easiest expenses to underestimate before tear-off begins. Contractors cannot always see every damaged section during an exterior inspection. Your contract should explain how they measure and price replacement sheathing.
Complex architecture can also increase labor. Valleys, skylights, chimneys, steep slopes, multiple levels, and limited access require additional cutting or safety preparation. Regional wage differences further explain why national averages cannot predict your exact quote.
Material upgrades create another major price difference. Architectural shingles cost more than basic products, while metal and tile can raise costs considerably. Compare lifespan, maintenance, climate suitability, and warranty terms rather than upfront price alone.
How to Prepare Your Home Before Installation Day
Move vehicles away from the house before crews and delivery trucks arrive. Remove fragile outdoor items near the work zone and protect valuable objects stored in the attic. Vibrations from tear-off and fastening can stir up dust or dislodge unsecured items.
Inside the house, remove fragile objects from walls on upper floors. Outside, mark delicate plants, irrigation equipment, lighting, and hidden obstacles. Contractors may cover landscaping, but discussing vulnerable areas beforehand reduces misunderstandings.
Keep children and pets away from active work areas. Debris or fasteners can fall during removal and cleanup. You should also confirm where crews will place trailers, material pallets, and disposal containers.
When Is the Best Time to Replace a Roof?
Contractors need suitable conditions for safe work and proper material handling. Heavy rain, snow, high winds, or extreme conditions can interrupt the schedule. Seasonal demand also affects contractor availability in many regions.
Waiting for an active leak is rarely the ideal planning strategy. Aging materials, repeated repairs, curling shingles, missing pieces, or recurring moisture may justify an inspection sooner. Early planning gives you more time to compare bids and financing choices.
Regular exterior maintenance can reduce avoidable problems around the house. You can also browse AHomeGuru’s exterior home improvement resources for related maintenance and property-care guidance.
Roofing Installation FAQ
Can you stay home while a new roof is installed?
Many homeowners stay home during the project, but the work can be loud and disruptive. Hammering and movement overhead may continue for several hours each day. Discuss access, pets, children, parking, and working hours with the contractor beforehand.
Does roofing installation require a permit?
Permit rules vary by city, county, state, and project scope. Many jurisdictions regulate substantial replacement work and may require inspections. Your contractor should explain applicable local requirements before construction starts.
How do I know if the roof deck needs replacement?
Soft, rotted, delaminated, or structurally damaged sheathing may need replacement. Some damage only becomes visible after crews remove the existing covering. Ask the contractor to document unexpected deck repairs before covering them.
Is asphalt or metal better for a new roof?
The better choice depends on budget, climate, structure, appearance, and long-term plans. Asphalt usually costs less upfront, while metal often costs substantially more. Compare complete installed quotes and product warranties for your house.
Should flashing be replaced with a new roof?
Inspect existing flashing carefully during replacement. Damaged, corroded, incompatible, or poorly installed pieces can allow water beneath new materials. Your proposal should state whether flashing replacement is included.
Plan the Project Around the Whole Roof System
A successful replacement depends on preparation beneath the visible finished surface. Deck condition, water protection, flashing, ventilation, fastening, and edge details all affect future performance. Comparing complete project scopes is more useful than comparing material prices alone.
Start by requesting detailed estimates from qualified contractors serving your area. Ask each company to explain exclusions, warranties, deck-repair pricing, permits, and cleanup before you sign. Clear expectations now can prevent expensive surprises after construction begins.