Drywall
Drywall installation is a crucial part of any construction or renovation project, and taping and mudding play a pivotal role in achieving smooth, professional-looking walls. When done correctly, taping and mudding can distinguish between a flawless finish and an amateurish appearance. This article unveils the secrets to perfecting your taping and mudding drywall, ensuring that your drywall projects exude professional quality.
| Taping And Mudding Drywall Types | Paper tape, Mesh tape, Pre-creased tape |
| Where to Use? | Seams, corners, patching, and repairs |
| Cost | Varies by project size and materials; typically $0.30-$0.60 per square foot |
| Tools Required | Taping knives, mud pans, sanding tools, joint compound |
| Origin | Developed in the early 20th century, popularized in the 1940s |
| Colors Use | Generally white or off-white, can be painted any color |
| Contractors Inside USA | Available nationwide; major companies include USG, CertainTeed, and National Gypsum |
| Wikipedia | …./wikipedia.org/wiki/DrywallFinishing |
This table provides a concise overview of various aspects related to taping and mudding drywall.
Why Proper Drywall Taping and Mudding Matters for a Seamless Wall Finish
Taping and mudding drywall is the essential finishing step that turns rough wall panels into smooth, professional-looking surfaces. By applying drywall tape over seams and covering it with layers of joint compound, all joints, screw holes, and imperfections are hidden beneath a uniform finish. This process not only improves the visual appearance of the wall but also strengthens it by preventing cracks and surface separation over time. When done correctly with multiple thin coats and careful sanding between layers, the final result is a flawless, paint-ready surface that forms the foundation of high-quality interior walls.
Essential Tools and Materials for Taping and Mudding Drywall
Before diving into the process, it’s necessary to have the right tools and materials on hand. Here’s what you’ll need:
- Taping Knives: Various sizes (4, 6, and 12 inches) for different applications.
- Mud Pans: For holding and mixing joint compounds.
- Sanding Tools: Sanding blocks, poles, and sponges.
- Drywall Tape: Paper tape, mesh tape, and pre-creased tape for corners.
- Joint Compound: All-purpose and topping compounds.
These tools will make the taping and mudding process smoother and more efficient.
Preparing Your Workspace
A well-prepared workspace is the foundation for a successful drywall project. Start by cleaning the drywall surface to remove any dust or debris. This ensures that the tape and joint compound adhere properly. Set up your workspace with all the tools within easy reach to streamline the process. Don’t forget to wear safety gear, including a dust mask and safety goggles, to protect yourself from dust and debris.
The Best Techniques for Applying Drywall Tape
Choosing the correct type of tape for your project is crucial. Paper tape is ideal for seams, while mesh tape is better for patching and repairs. Pre-creased tape works well for corners. Here’s a step-by-step guide to applying tape:
- Apply a thin layer of joint compound: Use a 4-inch knife to spread a thin compound over the seam.
- Embed the tape: Place it over the compound and press it with the knife, ensuring no bubbles.
- Smooth the tape: Use the knife to remove excess compound and smooth the tape.
- Repeat for corners: Use pre-creased tape for inside corners and follow the same process.
Avoid common mistakes, such as overloading the tape with compound or failing to smooth out bubbles, which can lead to imperfections.
Secrets to Perfectly Smooth Joint Compound Application
Achieving a perfectly smooth joint compound application requires precision and patience. Start by mixing the joint compound to the right consistency, not too thick or runny. For the first coat, use a 6-inch knife to apply a thin compound layer over the tape, feathering the edges to blend seamlessly with the drywall.
- First Coat: Apply the first coat of compound, ensuring it’s smooth and even. Feather the edges to blend it with the drywall.
- Second Coat: After the first coat dries, apply a second coat with a broader knife (10-12 inches) to smooth the surface further.
- Third Coat: For a professional finish, apply a final thin coat, feathering the edges carefully.
Remember, thin coats are better than thick ones, as they dry faster and reduce the risk of cracks.
Importance of Layer Control in Drywall Finishing
One of the most important factors in achieving a professional drywall finish is proper control of joint compound layers. Applying too much compound in a single coat can lead to uneven surfaces, cracking, and extended drying times, while very thin coats ensure better adhesion and smoother blending with the drywall surface.
Each layer should be carefully feathered out to reduce visible edges and create a seamless transition between the taped joints and the surrounding wall. Allowing adequate drying time between coats is equally important, as it strengthens the finish and prevents future surface defects. Consistent layering and patience during this process are key to achieving a durable, paint-ready wall surface.
Sanding and Finishing for a Flawless Look
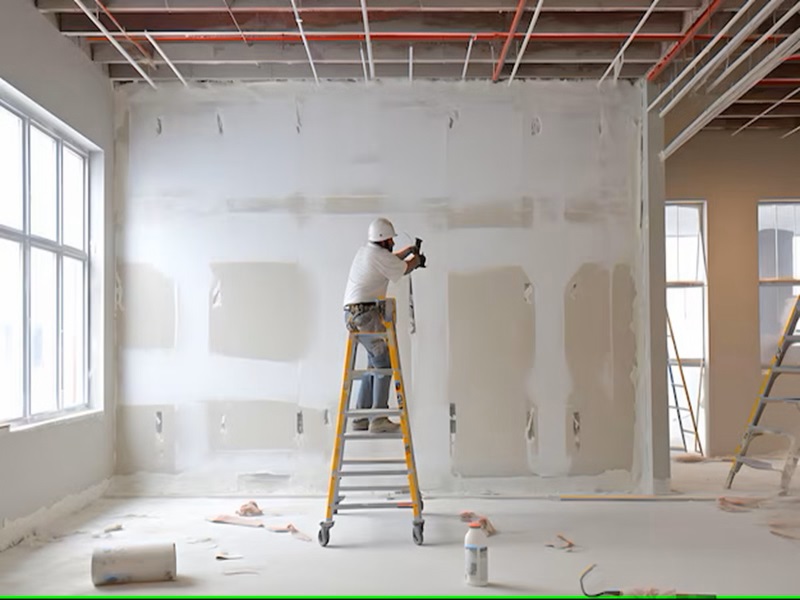
Sanding is a critical step in achieving a smooth and even surface. Once the joint compound is completely dry, use sanding blocks or poles with fine-grit sandpaper to sand the surface. Start with a light touch to avoid creating gouges. Sand in a circular motion and frequently check your work by running your hand over the surface to feel for imperfections.
For a flawless finish:
- Sand the surface: Use fine-grit sandpaper and sand lightly to smooth the compound.
- Inspect and touch up: Use a bright light to inspect for imperfections and apply additional compound if needed.
- Final sanding: Sand the touched-up areas lightly.
Proper sanding techniques will ensure a smooth and even surface ready for painting.
Advanced Tips for Achieving Professional Results
Handling challenging areas like inside corners and butt joints requires advanced techniques. For inside corners, use pre-creased tape and apply compound to both sides simultaneously. Smooth the tape and apply thin coats of compound, feathering the edges carefully. For butt joints, which are the seams where two non-tapered edges meet, use a broader knife to feather the compound over a larger area, reducing the visibility of the joint.
To achieve a perfect finish, apply a second and third coat of compound, sanding lightly between each coat. This builds up a smooth, even surface that blends seamlessly with the surrounding drywall.
Common Problems and How to Fix Them
Even with the best techniques, problems can arise. Here are some common problems and how to fix them:
- Bubbles in Tape: This occurs when the tape isn’t embedded correctly. Cut out the bubble and reapply the tape and compound.
- Cracks in Compound: Cracks can occur if the compound is applied too thickly. Sand down the crack and apply a thin layer of compound.
- Ridges and Valleys: These can be fixed by sanding down the high spots and applying additional compounds to the low spots.
You can maintain a smooth, professional finish by addressing these issues promptly.
Final Touches and Preparing for Painting
Before painting:
- Ensure the surface is free of dust and imperfections.
- Use a damp cloth to wipe down the walls and remove dust from sanding.
- Prime the walls with a high-quality primer to seal the joint compound and create a uniform surface for painting.
Clean your workspace efficiently by properly disposing of leftover materials and cleaning your tools. Perform a final inspection to ensure the surface is flawless and ready for paint.
Conclusion
Mastering the art of taping and mudding drywall is essential for achieving professional-quality results. By following these secrets and techniques, you can create smooth, seamless walls that enhance the overall appearance of your space. Practice and patience are essential; with time, you’ll develop the skills to tackle any drywall project confidently.
That’s it! Still curious to read an article covering Painted Brick Ideas, then explore our “Interior Design” category.
Frequently Asked Questions (FAQs)
Paper tape is generally the best for drywall seams because it provides strong adhesion and a smooth finish. Mesh tape is also effective but is typically used for repairs and patches.
Joint compounds should dry for at least 24 hours between coats and before sanding. Ensure the compound is completely dry to avoid damaging the surface during sanding.
Bubbles usually appear when there is not enough joint compound beneath the tape or when the tape is not pressed in firmly.
Most drywall finishing jobs require three coats of joint compound — a base coat, a fill coat, and a final skim coat.