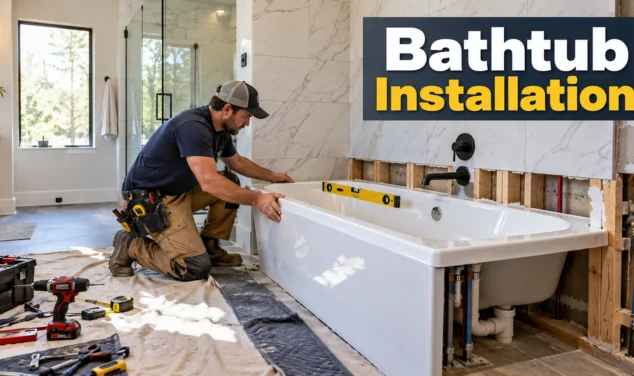

Bathtub installation looks simple until plumbing, framing, support, and waterproofing meet in one tight space. A sound job starts with accurate measurements and ends with a leak test before you finish and hide the connections. For U.S. homeowners, the safest plan also accounts for local permits, labor, and the tub manufacturer’s instructions. More from us: Generator Installation.
| Planning point | Practical guidance |
|---|---|
| Typical U.S. project cost | Many replacements fall around $1,500–$8,000, but complex jobs can cost more. |
| Typical timeline | A straightforward replacement may take one day; repairs and tile work add time. |
| Best DIY candidate | Same-size alcove swap with accessible plumbing and sound framing. |
| Call a pro when | Plumbing moves, structural repairs, heavy tubs, electrical work, or permits are involved. |
| Most important check | Fill the tub and inspect every drain, overflow, and supply connection before closing walls. |
A good installation follows four stages. First, measure and prepare the structure. Next, dry-fit, support, secure, and connect the drain. Then reconnect plumbing and run a full leak test. Support and fasteners depend on the product, so follow its manual.
Key Takeaways
- Measure the alcove, doorway, drain side, and plumbing position before buying.
- Repair soft subflooring or damaged framing before installing the new unit.
- Dry-fit and level the tub before making permanent plumbing connections.
- Use only the support method and sealants approved for your specific model.
- Test for leaks before installing wallboard, tile, trim, or access-panel covers.
Bathtub Installation: What Should You Budget?
Current U.S. cost guides vary because they count different project scopes. HomeGuide lists an average replacement range of $1,500 to $8,000, including the new unit and installation. HomeAdvisor reports a broader 2026 range of $2,101 to $9,747, with an average near $5,922.
| Cost driver | Why it changes the price | Budget effect |
|---|---|---|
| Like-for-like alcove swap | Existing drain, valves, and framing stay in place. | Usually lower |
| Freestanding or specialty tub | Visible plumbing, floor work, or heavier handling may be required. | Usually higher |
| Drain or supply relocation | More plumbing labor and possible permit work are added. | Higher |
| Subfloor or wall damage | Water-damaged materials must be repaired before finishing. | Higher |
| Tile or surround replacement | Demolition, backer, waterproofing, setting, and cure time are added. | Higher |
The tub price alone doesn’t predict the final bill. Demolition, disposal, plumbing changes, wall repair, and finish work can cost more than expected. Get an itemized quote that states what happens if hidden damage appears after removal.
What You’ll Need Before You Start
Start your tool list with the manual for your exact model. Manufacturer instructions can specify unique support, sealant, drain, and fastening requirements. AHomeGuru’s plumbing section can also help you review related home water-system topics before opening walls.
- Tape measure, pencil, framing square, and level
- Safety glasses, gloves, towels, and a bucket
- Drill or driver with manufacturer-approved bits and fasteners
- Adjustable wrench, pliers, and drain tools as required
- Drain-and-overflow assembly matched to the tub
- Approved silicone, gasket material, or sealant
- Shims, ledger material, mortar, or adhesive only when specified
- Wallboard, waterproofing, surround panels, or tile materials for finishing
Kohler’s current guide recommends checking the subfloor, studs, drain position, and level before final placement. It also advises testing the drain assembly before fully securing the tub. That sequence reduces the chance of hiding a connection that still needs adjustment.
8 Steps to Install a Tub Correctly
- Confirm fit and access. Measure the alcove, doorway, drain side, and finished wall thickness. Compare every measurement with the product drawing.
- Shut down and remove the old unit. Turn off water where required and disconnect accessible plumbing. Protect floors and follow safe removal methods for the old material.
- Inspect the structure. Check studs, subflooring, and the drain opening for damage or movement. Repair rot, softness, or framing problems before continuing.
- Dry-fit and level the new tub. Place it without final sealant and confirm drain alignment. Check the level in both directions and correct the supporting surface.
- Install the drain and overflow. Assemble parts per the instructions and use the approved gasket or sealant. Do not substitute materials the manufacturer prohibits.
- Prepare the support system. Add a ledger, mortar bed, adhesive, shims, or feet only when the product requires them. The tub should rest on its intended supports.
- Set, secure, and reconnect. Move the unit into position, recheck the level, and fasten the flange as directed. Connect the drain and water fittings without overtightening them.
- Fill, test, and finish. Run water, fill the tub, and inspect the drain, overflow, supply joints, and access area. Finish the surround only after the connections stay dry.
Installation sequence synthesized from current Kohler and Home Depot guidance.
Do not copy one brand’s installation details onto another model. One acrylic unit may require a mortar bed, while another uses molded feet or adhesive. Product-specific instructions protect the fixture and may also protect its warranty.
DIY or Hire a Professional?
A careful DIYer may handle a same-size replacement when the plumbing stays put. The work becomes riskier when the drain moves, the floor needs reinforcement, or walls reveal damage. Heavy cast-iron units also create lifting and floor-loading concerns that deserve professional review.
HomeAdvisor recommends a plumber for the plumbing side of a tub replacement. Jetted or powered models may also require an electrician for dedicated electrical work. Before hiring, verify licensing, insurance, scope, cleanup, permit responsibility, and the labor warranty in writing.
Permits and Code Checks in the United States
Permit rules are local, so there is no single U.S. answer for every replacement. A simple fixture swap may be treated differently from moving a drain or adding electrical work. Check your city or county building department before demolition if the scope changes plumbing or wiring. That call can also clarify inspection timing and licensed-trade requirements.
Scheduling an inspection before walls are closed is easier than reopening finished tile later. Keep the product manual and approved plans available for the installer and inspector.
Common Mistakes That Cause Leaks or Rework
Most expensive failures begin before the final caulk bead. A soft floor, misaligned drain, or unsupported base can create movement that stresses seals. AHomeGuru’s guide to water-leak prevention explains why small plumbing leaks deserve fast attention.
- Ordering before checking doorway clearance and drain orientation
- Ignoring soft subflooring after the old tub is removed
- Assuming every acrylic tub needs the same mortar or adhesive
- Fastening a flange before the unit is level and properly supported
- Using the wrong sealant around the drain or overflow
- Closing the wall before performing a full leak test
- Skipping access for future drain, valve, or pump service
Finish choices matter after the plumbing passes inspection and testing. Browse AHomeGuru’s bathroom section for broader room planning ideas. If tile layout is part of the remodel, the herringbone pattern guide covers scale, direction, and wet-area material considerations.
How Long Does the Work Take?

A straightforward professional replacement can often be completed in one working day. HomeAdvisor estimates four to eight hours for a basic installation, while larger projects can take longer. Tile, waterproofing, subfloor repair, plumbing relocation, and curing requirements commonly extend the schedule.
Plan for the bathroom to remain unavailable beyond the moment the tub is physically set. Sealants, grout, or waterproofing products may need curing time before use. Follow every product’s stated cure period instead of relying on a generic waiting time.
Final Pre-Finish Checklist
Before closing walls, confirm that the tub is level, stable, and correctly fastened. Fill it, operate the drain, test the overflow, and inspect every reachable joint. Photograph hidden connections before wallboard or tile covers them, because those images can help with future repairs.
- The model, drain side, and dimensions match the space.
- The subfloor and framing are sound.
- The support method matches the manufacturer’s instructions.
- The drain and overflow stay dry under a full water test.
- Supply fittings and valves show no seepage.
- Required permits or inspections are complete.
- The surround and sealant system is ready for its required cure time.
If any joint drips, stop before finishing the wall. Fixing an exposed connection is far cheaper than opening a completed surround. If the scope exceeds your skills, request an itemized quote from a qualified local professional.
Frequently Asked Questions
How much does bathtub installation cost in the U.S.?
Many full replacements fall within roughly $1,500 to $8,000, although complex projects can exceed that range. The final cost depends on the fixture, labor, demolition, plumbing changes, and wall or floor repairs. Compare quotes only after confirming that each contractor priced the same scope.
Can I install a tub myself?
Yes, some experienced DIYers can handle a simple like-for-like alcove replacement. The job requires accurate leveling, secure support, reliable drain connections, and careful leak testing. Hire licensed trades when local rules require them or the project changes plumbing, structure, or electrical systems.
Do I need a permit to replace a tub?
Maybe, because permit rules vary by city, county, and project scope. Moving drains, supply lines, or electrical circuits is more likely to trigger local requirements. Ask the local building department before work starts, rather than assuming a previous project’s rules still apply.
How do I prevent leaks after installation?
Use the approved drain parts, gaskets, sealants, and support method for the exact model. Fill the tub and inspect the drain, overflow, supplies, and access area before closing walls. Recheck joints after testing, because a slow seep may not appear during a quick faucet run.